
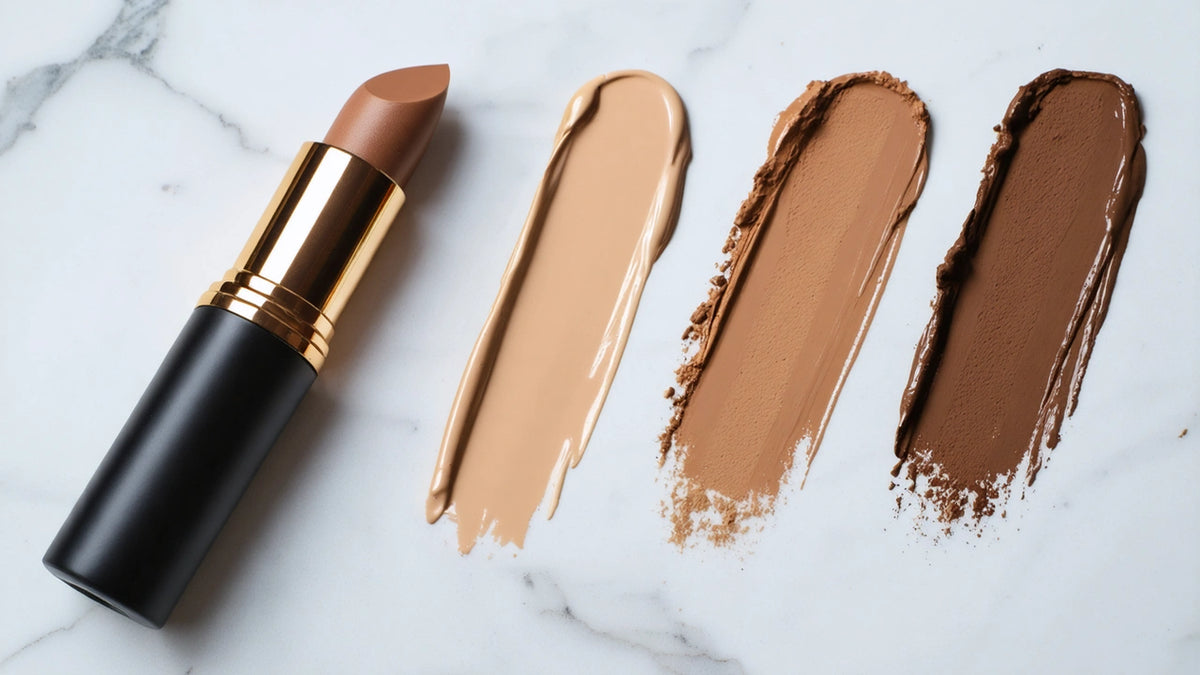
Here's how to apply foundation stick without the cakey, orange-jawline drama: find your undertone first, dot the stick on the centre of your face, blend outwards with a damp sponge, build only where you need it, and set only the oily bits. A foundation stick is a solid, twist-up foundation that you glide straight onto skin and blend out. Think of it as foundation and concealer in one bullet that fits in your bag. Below is the full big-sister walkthrough with the Ace Of Face Foundation Stick, from the shade match to a finish that can handle the humidity.

How to Apply Foundation Stick: What Is the 5-Step Answer?
To apply a foundation stick, follow five steps. First, prep with moisturiser and sunscreen and wait a few minutes. Second, dot the stick on your forehead, nose, cheeks and chin. Third, blend outwards with a damp sponge or dense brush. Fourth, build a thin second layer only where you need coverage. Fifth, set oily zones with powder.
- Prep: moisturiser and SPF go on first, then you wait until your skin stops feeling slippery so the stick grips instead of sliding.
- Dot: put small swipes on the centre of your face, where most of us need the most coverage.
- Blend: press and bounce the product outwards towards your hairline and jaw.
- Build: add a second thin layer only over redness, pigmentation or blemishes, never all over.
- Set: press powder into your T-zone and leave drier areas alone.
That's the short version. The details below are what make the difference between "is she wearing makeup?" and "why is her face a different colour from her neck?"
Step 1: How Do You Find Your Undertone for a Foundation Stick Shade Match?
Step 1: Find your undertone before you swatch. Your skin tone is how light or deep you are. Your undertone is the colour sitting under the surface. You need both to get a good foundation stick shade match.
Warm, cool, neutral or olive?
Do two quick tests at home. For the vein test, look at the inside of your wrist in natural light. Greenish veins usually mean warm, bluish-purple veins mean cool, and a mix usually means neutral. For the jewellery test, ask yourself whether gold or silver makes your skin look more alive. If gold wins, you're probably warm. If silver wins, probably cool. If both work, you're neutral.
Olive is the one that trips people up. If most foundations look either too pink or too orange on you, and your skin has a slightly green-grey cast, you're probably olive and should lean towards neutral-to-golden shades. Many Indian skin tones fall within Fitzpatrick III to V, and golden, olive and neutral undertones are common across fair, wheatish, dusky and deep skin. That's exactly why a pink-leaning shade can look grey or ashy on so many of us.
Whether you're fair, wheatish, dusky or deep, decide your undertone first and pick your depth second. Check the current shade names and undertone descriptions on the product page, because ranges get updated and we won't guess shade numbers here. For a deeper walkthrough by undertone, read our undertone-first foundation shade match guide.
The jawline swatch in daylight
Skip the wrist and the back of your hand, because neither matches your face. Swipe three close shades along your jawline, from cheek down to neck, then stand near a window. The one that disappears into both your face and your neck is your match. Store lighting and bathroom bulbs lie. Daylight doesn't.
The 15-minute oxidation check
Don't decide straight away. Many foundations can look a little deeper or warmer once they settle. Part of the reason is that the lighter, quick-drying ingredients evaporate, and the pigment mixes with your skin's natural oils. The shift tends to show more on oily skin. Wait 15 minutes and check again in daylight. If the swatch has turned deeper or orange, go half a step lighter or move to a more neutral undertone.
Steps 2 and 3: How Should You Prep and Dot a Foundation Stick?
Step 2: Prep the canvas. Apply a light moisturiser, then sunscreen, and give both time to sink in before the stick goes anywhere near your face.
Moisturiser and SPF wait time
If you're oily, use a gel moisturiser. If you're dry, use a cream. Follow with your sunscreen. A gel texture like the Tan Ban Hyaluronic Acid Sunscreen Gel SPF 50+ PA+++ sits nicely under a stick. Then wait a few minutes until your skin feels comfortable rather than slippery. Rush this and the stick will skid, pill or patch, especially in monsoon humidity when your skin already feels damp.
Step 3: Dot from the centre outwards. Glide short swipes of the stick onto the centre of your face and keep each layer thin.
Where to dot: centre of face outwards
Put one swipe in the middle of your forehead, one on either side of your nose, one on each cheek and one on your chin. That's it. You blend outwards from the centre because that's where redness and uneven tone usually sit, and the edges of your face stay naturally sheer. A thin layer looks like skin. A thick layer looks like a mask, and it's harder to blend.
Got dry patches? Don't drag the stick over flaky skin. Swipe it on the back of your hand first, let your body heat soften it for a few seconds, then pick it up with your sponge or fingertips and press it into those spots.
If your skin is properly dry this winter and even a warmed stick feels heavy, a liquid formula might suit you better. The same rules apply, just with drops instead of dots.

Step 4: Should You Blend a Foundation Stick With a Sponge or a Brush?
Step 4: Blend and build. Press the product into your skin with a damp sponge or a dense brush, then add a second thin layer only where you need more coverage.
Sponge for natural finish
Wet your sponge, then squeeze it until it's only damp. Bounce and press it over each dot, working outwards. Pressing pushes the pigment into your skin. Dragging just moves it around and leaves streaks, which is why so many people say sticks look patchy. A damp sponge also picks up a little excess product, so you end up with a softer, more skin-like finish.
Brush for more coverage
Want a fuller look for a wedding, an office presentation or photos? Use a dense flat-top brush. Buff in small circles to break up the product, then finish with a few presses. Not sure you even need this much coverage? Our BB cream vs foundation stick coverage guide can help you decide.
Now build. Tap the stick straight onto a blemish, around your nostrils or over pigmentation, then blend just the edges with your ring finger, the way you'd use concealer. Leave the centre of the spot alone so the coverage stays where you want it. For your under-eyes, a separate concealer pressed in thinly after the base works well.

Hairline and jaw blending
Whatever's left on your sponge goes to your hairline, past your jawline and a little down your neck. Don't add new product here. These edges are where a stick gives itself away, so make sure there's no visible line.
Step 5: How Do You Set Stick Foundation for Oily Skin and Humidity?
Step 5: Set only where you get oily. Press powder into your T-zone and any other spots that shine, and leave the rest of your face alone.
Press compact on T-zone only
Press the SUGAR POP 20 HR Longwear Compact onto your forehead, nose and chin with a puff. Press and roll the puff rather than swiping it. Kaolin clay is often used in face powders because it can soak up surface oil, and powder in general helps a cream base grip during long commutes. Powdering dry cheeks makes them look flat, so skip them. For more ways to keep your base in place through Indian summers, read our sweat-proof makeup survival guide.
Add dimension with contour
Full coverage can make your face look a bit flat. Bring the warmth back with the Contour De Force palette: sweep bronze along your cheekbones and temples, and add a little blush on the apples of your cheeks. For a final lock before a long day or a sangeet night, mist the Grand Finale Matte Setting Mist over your face and let it dry without touching. Stick foundation for oily skin works best this way: thin layers, targeted powder and a mist on top.
Frequently Asked Questions About how to apply foundation stick
What is a foundation stick and who is it best for?
A foundation stick is a solid, twist-up or swipe-on base that you glide straight onto skin and blend out. It's best for people who want fast, travel-friendly coverage without pumps, bottles or mess. Think of it as your five-minute face on the go. It suits beginners, busy mornings and touch-ups in a handbag. Light-to-medium coverage builds easily, so you control how much you wear. Always check the shade against your neck and jaw in daylight before buying.
Is a foundation stick good for oily skin in humid weather?
Yes, a foundation stick can work for oily skin if you keep the layers thin and set them well. Skip heavy swiping on the T-zone, because too much product can slide when you sweat. Mattify with a light dusting of translucent powder only where you shine, and carry blotting papers for monsoon days. Prep with a lightweight, oil-free moisturiser so the base grips instead of sliding. If your skin turns very greasy by noon, build coverage only where you need it.
Can I use a foundation stick over sunscreen and primer?
Yes, you can layer a foundation stick over sunscreen and primer, as long as each layer has a minute or two to settle. Start with moisturiser, then sunscreen, then a thin primer if you like. Wait until everything feels tacky-dry, not wet, before you swipe on the stick. Pilling usually means too many products or rubbing too hard, so pat instead of dragging. Keep primer to the areas where makeup tends to fade, like the nose and forehead.
How do you fix a cakey or patchy foundation stick finish?
To fix a cakey or patchy foundation stick finish, press a damp sponge over the area and lightly bounce until the product melts into skin. Cakiness usually comes from applying too much, or from dry patches that grab the product. Next time, exfoliate gently and moisturise first, then use fewer dots and blend outward. A few drops of a hydrating mist on the sponge can revive dried-out edges. Skip adding more powder on top, which only makes the texture heavier.
What are the benefits of using a foundation stick over liquid foundation?
The main benefits of a foundation stick are speed, portability and control. There's no spilling, so it travels well in a bag or a gym kit. You can place product exactly where you need it, then build coverage in thin layers. It also makes quick midday touch-ups simple, since you can tap a little onto problem areas. Liquid formulas can feel lighter across the whole face, so pick based on how much time and coverage you want.
Shop SUGAR Cosmetics
You've got the method. Now get the match. Do the undertone test, swatch on your jaw in daylight, wait your 15 minutes, and then pick your Ace Of Face Foundation Stick shade. Still torn between two? Our foundation shade guide for Indian skin walks you through finding your match. SUGAR is cruelty-free, so you can blend away with zero guilt.